What are we going to build?
We are building an app from Figma design:- Build all the screen available in the Figma
- Navigate to other screen
Requirements
- Figma for the design
- Correctly tagged Figma element
Step 1: Prepare Figma project
You can use your current Figma or If you don’t have any, you can create one Sign up for free in Figma
Step 2: Tagging Figma element
Tagging in this context is a term that refers to adding specific labels or identifiers to Figma elements to define their roles in the app’s layout. This helps the app generator, like AppStudio, recognize and categorize each element correctly.- Organizational Clarity: Tagging layers with names like
[FirstScreen]or widget tags such as[ASColumn]makes the structure clear for both designers and developers. It indicates the purpose and function of each element, reducing guesswork during implementation. - Automated App Generation: AppStudio relies on tags to understand how to convert Figma elements into app components. For example,
[ASRow]tells AppStudio to treat an element as a row structure, making it easy to map Figma designs to app widgets. - Design Consistency Across Devices: Proper tagging, combined with using flexible layouts (like Flex or Auto layout), helps ensure that the app’s UI adjusts smoothly across various screen sizes, minimizing breakages and display inconsistencies.
- Exclusion of Non-Essential Elements: Adding
[SKIP]to certain layers tells AppStudio to ignore them, allowing for a cleaner, more efficient UI generation without unnecessary elements.
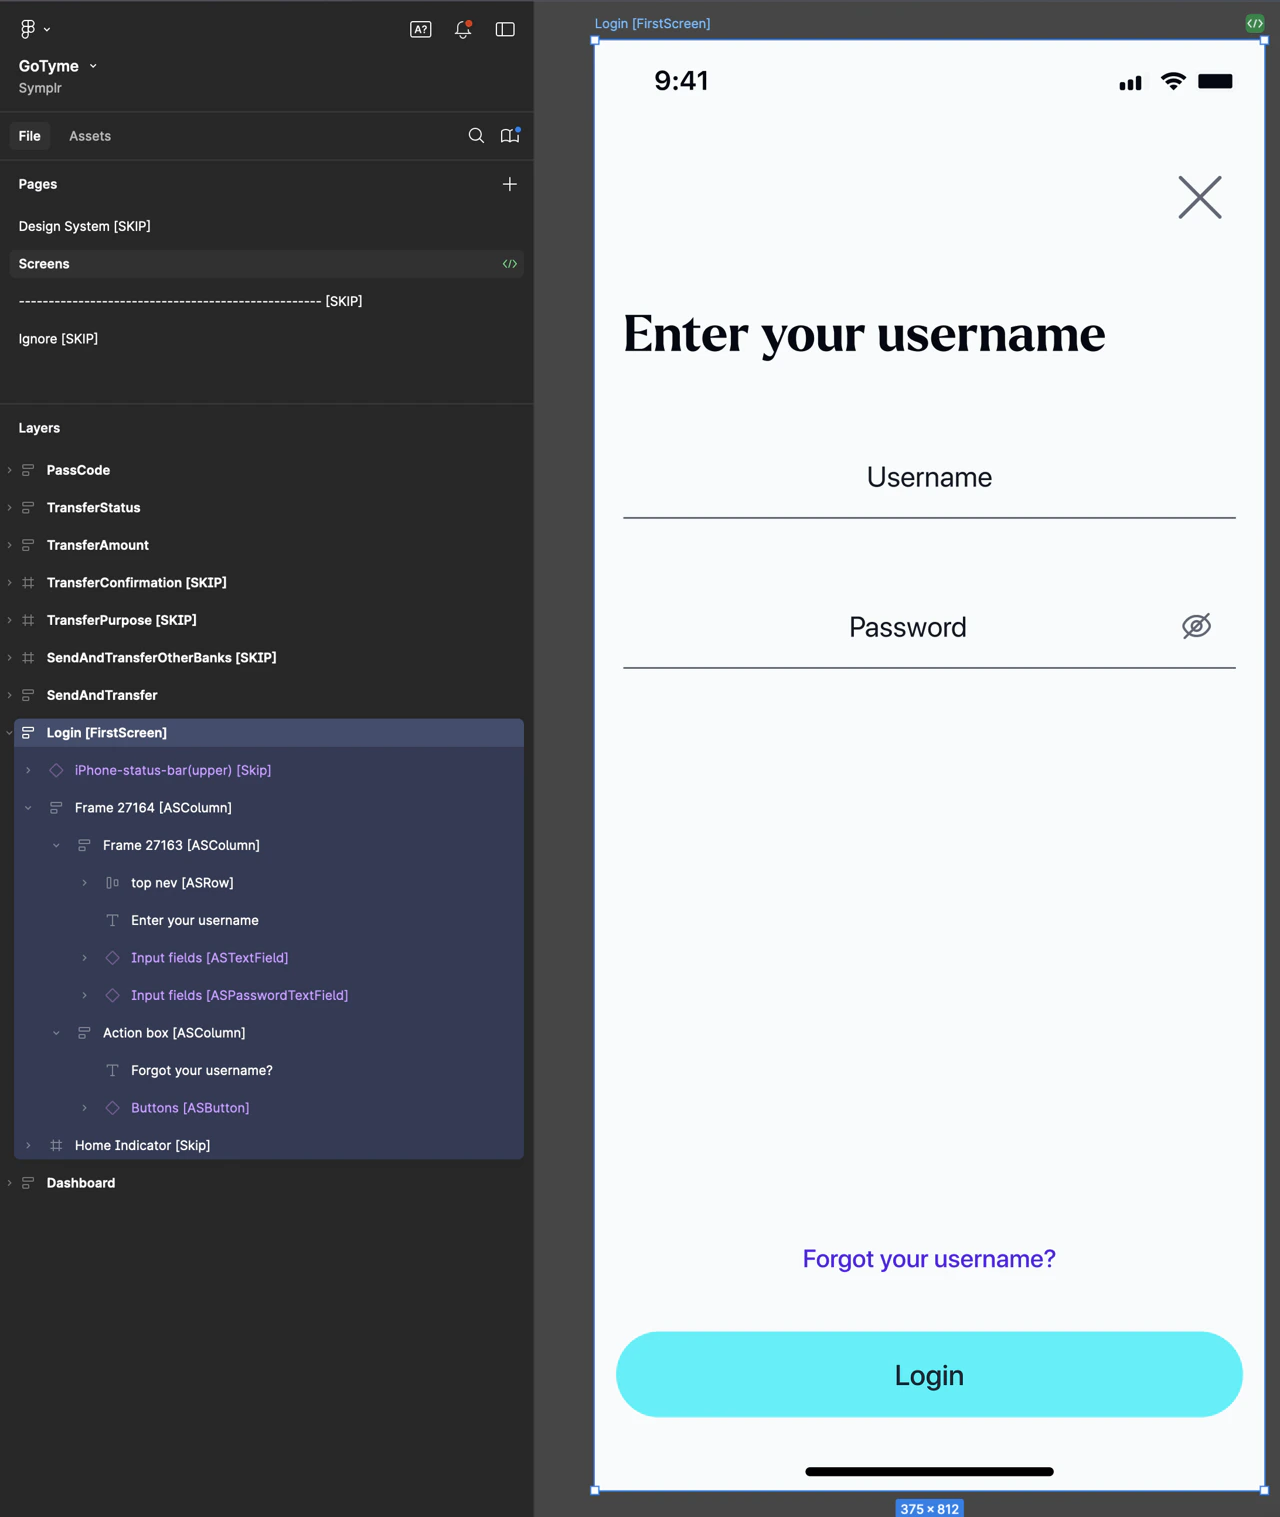
Tagging screen:
- The
Layername will be the screen name. Ex: Dashboard, SendAndTransfer - The App need to know which
Layeris the 1st screen. Add[FirstScreen]to it’s name to let AppStudio know it’s the first screen. There’s only 1[FirstScreen]in the Figma project.
Pages and Layers, inside Pages there are Layers. Figma Adapter will loop through all the Layers to generate the screen in each Page
Tagging widget element:
- AppStudio will read the Figma element and recognize the tag and import that element as a widget
- Add the coresponding tag after Figma element’s name
[Widget name, put a space between element name and the tag . Ex:Frame 123 [ASColumn],Frame XYZ [ASRow],Username fields [ASTextField],Password field [ASPasswordTextField],… - Add
[SKIP]to the Figma element name will skip importing it - Check this Symplr Widget Library for the list of available Widgets
Layer) details. We’ll use Login screen as an example:
NOTE:
- color should be SOLID, not GRADIENT_LINEAR
- The border of the widget should be set to the root (outmost) element
| Widget | Description | |
|---|---|---|
ASColumn |  | This Figma Frame to contain the Text and 2 Textfields vertically. So we can tag as[ASColumn]. All it’s styling (padding, border radius, background color,…) will be applied to the [ASColumn]
|